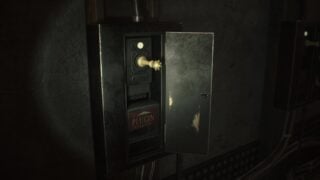
Kirby’s Return to Dream Land Deluxe Energy Spheres: Level 2 Raisin Ruins locations
Here’s where to find every Energy Sphere in the second world

Kirby’s Return to Dream Land Deluxe has 16 Energy Spheres in its second level, Raisin Ruins.
The level is split into four separate stages, with each containing three, four or five Energy Spheres.
Some of these are easy enough to find, but others could be causing you some trouble.
This guide will show you how to find every Energy Sphere in Level 2, Raisin Ruins.
If you’re stuck on a different level, head to our Kirby’s Return to Dream Land Deluxe Energy Spheres location guide hub.
Kirby’s Return to Dream Land Deluxe – Level 2-1 Energy Spheres
Sphere 1
At one point in the stage you’ll find a big rope fuse going under the ground. Get the Fire ability – there’s a pink enemy just to the left that has it, if you killed it run off to the side then come back and it’ll respawn.
Set the fuse on fire and run to the right, then jump into the cannon and wait for the flame to reach it. You’ll get blasted to a secret area where the first Sphere can be found.

Sphere 2
In the section where you flick the switch to let the boulders roll down the hill as you follow behind them, when they reach the bottom there’ll be a wall of blocks.
One boulder will crash into the wall, letting you get to the Sphere. Be quick though, because the other boulder is right behind you.

Sphere 3
After you beat Bonkers in the miniboss fight, steal his Hammer ability then run to the right.
You’ll see the last Sphere inside some steel blocks. These can be broken with the Hammer ability, meaning you can collect it.

Kirby’s Return to Dream Land Deluxe – Level 2-2 Energy Spheres
Sphere 1
During the section where you gain the Stone ability and slide down a series of slopes, keep an eye out for an area on the right with a stump and some stone blocks.
Jump over there, jump above the stump and use your Stone ability to slam onto it. This clears the blocks and reveals a secret door, where you can slam another stump to get the Sphere.

Sphere 2
While swimming underwater later in the stage, there’s another secret red door underneath the water, as seen in the screenshot.
Enter this door to get to a room with two bomb blocks. The right one frees the enemies, so just hit the left one (with an ability like Sword) to reach the Sphere.

Spheres 3 and 4
When you get the special Flare Beam weapon near the end of the stage, keep heading forwards until you reach a section with lots of stone heads (as seen in the screenshot).
Use Flare Beam to destroy all the heads and another star portal will open up, taking you to another Sphere Doomer fight and the last two Spheres.

Kirby’s Return to Dream Land Deluxe – Level 2-3 Energy Spheres
Sphere 1
During the section where the giant cannons are shooting at you, you’ll come to a point where part of the ground is moving up and down, with a large grey star block in front of you (as seen in the screenshot.
Suck up the block and collect the Tornado ability, then use it to break the blocks in front of you to reach the first Sphere.

Sphere 2
In the section after you get the first Sphere, you’ll get the Hi-Jump ability. Just after this you’ll find an area with two sets of star blocks on either side of the screen.
Ignore each side and perform a Hi-Jump right up the middle of the screen, breaking the blocks and revealing the Sphere.

Sphere 3
After you beat King Doo in the miniboss fight, steal his Beam ability. As you proceed upwards you’ll see a load of steel blocks with a bomb block right in the middle.
Stand next to the blocks and use the Beam ability to whip through them and hit the bomb block. This destroys all the blocks, revealing the third Sphere underneath.

Sphere 4
The final Sphere is found in the following section, where you fire yourself between the barrels. From the bottom barrel, keep firing up and right, until you eventually reach the top-right barrel.
This will fire you through two bomb blocks, and take you to a ledge where you can collect the last Sphere.

Kirby’s Return to Dream Land Deluxe – Level 2-4 Energy Spheres
Sphere 1
This is easiest if you have the Beam ability. Once you get indoors, move to the right until you see a secret door underneath some cracked blocks. Break the blocks with Beam and enter the door.
Once inside, don’t hit the switch, because it won’t stay on for long enough. Instead, drop to the lower area and use Beam to hit the switch from below, giving you time to get through the door and grab the Sphere.

Sphere 2
In the dark area, where you carry the candle, you’ll eventually see the Sphere in a little area above you, but it’s not immediately clear how to reach it.
Keep moving to the right then, when you jump up, head back to the left and use a destructive ability (like Beam) to break the blocks and reach the Sphere.

Sphere 3
In the section after the dark area you’ll eventually come across a blue-white gem. Picking it up turns Kirby invisible, but it only lasts a limited time.
Carry it to the right where you’ll find a secret door blocked by glass blocks. You can walk through these while carrying the gem. Keep a hold of it, because inside the door is the Sphere, with another glass wall in the way.

Spheres 4 and 5
In the area where you pick up the special Ultra Sword ability, proceed until you reach an area with four enemies, two cannons and two large pieces of wall held up by ropes (as seen in the screenshot).
Use the Ultra Sword here to destroy it all, spawning another star portal and another boss fight with a Sphere Doomer to get the last two Spheres.

For the locations of every other Energy Sphere in the game, head to our Kirby’s Return to Dream Land Deluxe Energy Spheres location guide hub.
