FFXIV Arcadion M4 guide – Wicked Thunder boss skills and strategy
Healer adjust

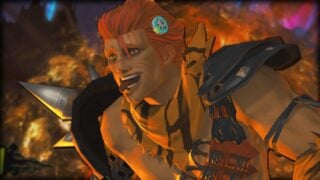
An Arcadion M4 Wicked Thunder boss strategy is what you’ll need if you can’t stomach the thought of going in blind with those expecting more of you. Here are all the Wicked Thunder skills to watch out for as you fight to survive against the competition’s returning star.
With enough power to take down a horse, Wicked Thunder demands applause of the same flavour with every strike. Get the drop on her by learning how her skills interact with the arena around you in the last of the Final Fantasy XIV Dawntrail raids at launch.
Wicked Thunder skills
- Wrath of Zeus | Raid-wide damage
- Sideways Spark | wide damage covering one side of the arena
- Shadow’s Sabbath | Summons a clone to cast Sideways Spark
- Wicked Jolt | Tankbuster
- Stampeding Thunder | Blasts 75% of the arena repeatedly (not cast)
- Effect name of the gun’s attack from the outer edge of the arena
- Thunderstorm | party-wide area attack markers (not cast)
- Comes after Fivefold Blast.
- Threefold Blast | Hits either side of the arena in the order its red and blue markers appear.
- Becomes Fivefold Blast later on.
- Wicked Bolt | Multi-hit stack marker
- Soaring Soulpress | Single-hit stack marker
- Bewitching Flight | Traces the arena’s lines with thunder
- Witch Hunt | Clones strike a path traced from the center around and out
- Wicked Hypercannon | linear stack pa
Introduction | Thunderbolts and Lightning
Wicked Thunder starts the fight by introducing her core skills: Wrath of Zeus, Sidways Spark, Shadow’s Sabbath, and Wicked Jolt (in that order). That’s raid-wide damage, a half-arena strike signalled by her cube-clutching hand, a skill that summons two clones in succession to cast the same still, and a powerful tank-buster for your bruiser of choice to sponge.
Phase 1 | Guns Out

After that, Wicked Thunder exclaims that “Electrope has many uses.” In this case, it’s a gun. Here’s how to deal with that.
Rather than look for which side her gun falls on, look for which row/column she’s positioned at. The gun hits that row and those to the immediate left and right, making the remaining far side safe. This 75% of the arena is blasted several times for high damage and blown to pieces with one last bang, killing anyone left on it.
Positioned in the middle of this final stretch of land, watch either side of her gun for icons denoting the order the remaining two sides of the zone will be blasted again. Step between the two halves as needed until she stops. Then she does it again. Watch for the targetted strikes after, watch the arena respawn, and stack for the hard-hitting Wicked Bolt. Don’t move: this one hits a few times. It’s the return of Ahk Morn.
Phase 2 | Wings Out

With fancy Electrope wings now outstretched, Wicked Thunder primes beams to slice down the arena. Get between any two to dodge. Position yourself away from the marking that begins to glow brighter than the rest. The space between it and the adjacent markings is primed to blow.
Now a safe spot, stand there and weave between the rest of the markings as they repeat the process. The last one (in the centre) blows while Sidesway Spark is cast, making only one side of the arena safe. Wicked Thunder attempts to deliver the decisive blow with a cast of Wrath of Zeus.
Right after, four clones appear via Shadow’s Sabbath, casting Sideways Spark in that order, with the boss’ own being the last. So long as you pay attention to dodge the first, you should have time to reposition for the rest.
Phase 3 | Witch Hunt

At this point, Wicked Thunder more or less repeats Phase 1 before falling back into phase 2, only upgrading Threefold Blast to Fivefold Blast—which is exactly what you think—and bringing a Shadow’s Sabbath clone to perform Bewitching Flight in tandem. This renders only small sections of the arena’s squares safe.
After that barrage, Witch Hunt (the attack) appears, spinning circle area markers from the boss out and around the arena in a clockwise position. These resolve fast, put you can predict the final landing zone almost immediately. Get yourself there and just run back to the centre as soon as it begins to resolve.
Phase 4 | Wicked Hypercannon

At around 15% HP (or until the end of the second Wing phase), Wicked Thunder retracts her wings and whips the gun back out, doing her usual thing to destroy all but a single strip of the arena.
From this point on, she’ll alternate between channeling the linear stack marker ‘Wicked Hypercannon’ for rapid raid damage, dropping individual markers on you to force a spread between rounds. At this point, it’s a fight for the survival of your healer’s mana pools. Pop your bursts and blow your limit break before your doctors have had enough.


